
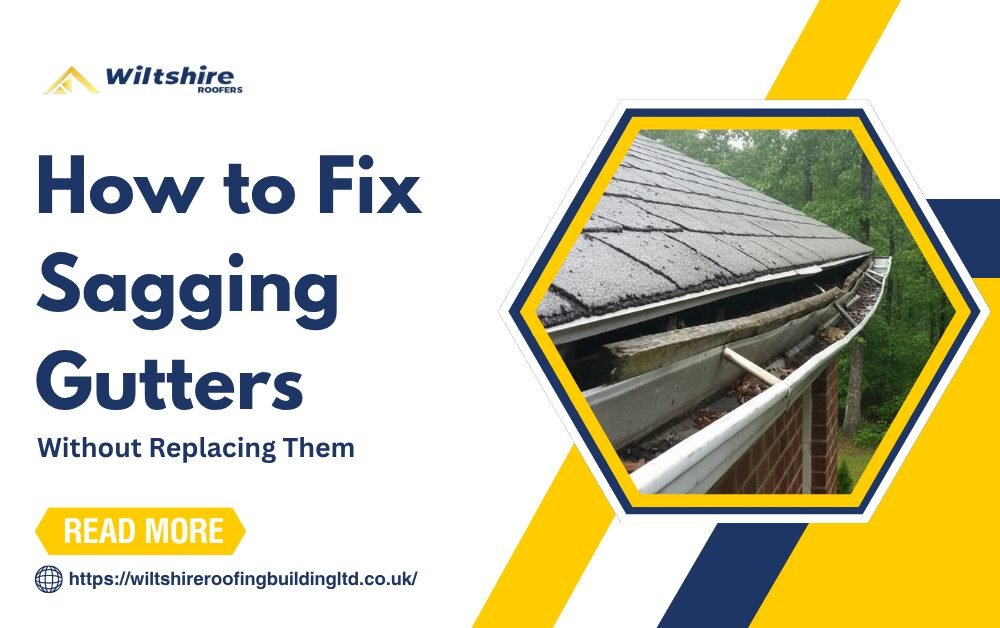
Sagging gutters might not seem like a big deal at first. But that small dip in your guttering can quickly lead to bigger problems, overflowing water, damp walls, rotting wood, and even damage to your home’s foundations. If you’re wondering how to fix sagging gutters before it gets to that stage, you’re in the right place.
The good news is that in many cases, you can fix sagging gutters yourself, as long as you spot the problem early and know what to do. This guide will explain everything in plain, simple terms: what causes gutters to sag, how to check for the problem, how to repair a sagging gutter step by step, and when it’s time to call in a professional.
What Makes Gutters Sag?
Before you climb up a ladder, it helps to understand why your gutters are drooping. There’s usually a clear reason and if you only fix the visible problem without fixing the root cause, it’ll just come back again.
1. Loose or Broken Gutter Brackets: This is the most common reason. Brackets (also called hangers) are the clips that hold your gutter against the fascia board. Over time, the screws can come loose, the brackets can rust, or the wood behind them can rot. When that happens, gutters fall off the house or start to sag. If you’re dealing with gutters pulling away from the house, failed brackets are almost always why and in older systems, worn rain gutter spikes are a common culprit too.
2. Blockages and Built-Up Debris Damaged gutters: are often caused by nothing more than neglect. Gutters full of leaves, moss, and muck get very heavy. All that extra weight puts strain on the brackets and causes the gutter to bow and droop, even if it was fitted perfectly when it was new.
3. Wrong Angle (Incorrect Pitch): Gutters need to slope slightly downhill toward the drainpipe. If the angle is off, water just sits in the gutter instead of draining away. That pooled water adds weight and eventually causes gutter sag. A proper gutter slope adjustment around 5–6mm of drop for every 3 metres of run is essential for the system to work correctly.
4. Expanding and Shrinking in Different Temperatures: uPVC gutters expand when it’s hot and shrink when it’s cold. Over many years, this repeated movement can slowly work brackets and joints loose.
5. Old Age: Most guttering systems last around 20–30 years. As they get older, the materials weaken, brackets corrode, and the whole system becomes less reliable.
6. Ice and Frost Damage: In cold winters, any water trapped in your gutters freezes and expands. This puts a lot of pressure on joints and fixings, something that affects many homes across Wiltshire and the surrounding areas during harsh UK winters.
What You’ll Need Before You Start
Gather these tools and materials before going up the ladder:
- A sturdy ladder (a standoff bracket helps keep it away from the guttering)
- Safety gloves and eye protection
- A cordless drill or screwdriver
- New gutter brackets
- Stainless steel or zinc-coated screws (standard steel screws will rust)
- A spirit level or piece of string
- Gutter sealant
- A trowel or gutter scoop for clearing debris
- A bucket and garden hose
Safety tip: Always have someone hold the base of your ladder. Never stretch too far to the side. If your gutters are on a two-storey home or are difficult to reach safely, please call a gutter specialist in Wiltshire, it's not worth the risk.
How to Fix Sagging Gutters: Step-by-Step Guide
Step 1: Clean the Gutters First
You can’t properly see what’s going on until the gutters are clear. Use your scoop to remove moss, all the leaves, and built-up dirt. Then run a garden hose through to see how the water flows.
Look out for:
- Water sitting in one spot (means the angle is wrong or there’s a dip)
- Water dripping behind the gutter (means it’s pulled away from the wall)
- Water overflowing at a certain point (means a blockage or a low spot)
- Cracks or gaps where sections join together
This step shows you exactly where the problem is before you start fixing anything.
Unsure how often your gutters actually need cleaning? We’ve put together a handy guide on how often to clean gutters so you know exactly what to do and when.
Step 2: Find the Loose or Damaged Brackets
With the gutter clean and dry, gently push up on different sections. Any part that moves a lot has a loose or broken bracket behind it. Mark those spots with chalk or tape.
For each bracket, check:
- Has the screw or rain gutter spike pulled out of the wood?
- Is the bracket itself cracked or corroded?
- Does the wood (fascia board) behind it feel soft or spongy?
If the fascia board is rotten, simply replacing the bracket won’t work, it won’t hold. Rotten fascia boards need to be repaired or replaced before anything else, and that’s a job for a qualified roofer.
Step 3: Repair the Sagging Gutter Brackets
For brackets where the screw has just worked loose:
- Unclip the section of guttering (most uPVC guttering just pops off)
- Take off the old bracket
- Fill the old screw hole with exterior-grade wood filler and let it dry fully
- Fit the new bracket slightly to one side of the old hole, using fresh stainless steel screws into solid wood
- Clip the guttering back on
One important thing to know: brackets should be spaced no more than 600mm apart (or 1 metre for half-round gutters). If yours are further apart than that, add extra brackets in between, this is one of the most effective long-term ways to fix gutter sag.
Step 4: Gutter Slope Adjustment: Set the Right Angle
Once the brackets are in place, you need to make sure the guttering is angled correctly toward the drainpipe. A lot of DIY repairs skip this step, which means water keeps pooling even after the brackets are fixed.
Here’s how to carry out a proper gutter slope adjustment:
- Tie a piece of string from the highest point of the gutter (furthest from the drainpipe) down to the drainpipe outlet
- Set the fall to roughly 1mm of drop for every 600mm of length — that’s about 1:600
- Adjust your brackets so the gutter follows this slope all the way along
- Run water through the system to check, it should flow straight to the drainpipe with no pooling
Step 5: Reseal Any Leaking Joints
While you’re up there, check every joint where gutter sections connect. The rubber seals inside these joints wear out over time and start to leak and that water can drip behind the fascia and rot the timber.
To reseal a joint:
- Unclip the two gutter sections from the connector
- Scrape out the old sealant
- Apply fresh gutter sealant, or replace the rubber seal
- Clip everything back together and leave it to set
If the connector itself is cracked or broken, just replace it, they’re cheap and easy to find at any builders’ merchant.
Step 6: Test the Whole System
Once all repairs are done, run your hose at full pressure from the highest point of the gutter and watch everything carefully.
You’re looking for:
- Water flowing smoothly all the way to the drainpipe, no pooling anywhere
- No drips from joints or connectors
- No water running down behind the gutter or fascia
- The drainpipe flowing freely at the bottom
If it all drains cleanly, the job is done. If you’re still seeing problems, there may be something more serious going on.
How to Stop Your Gutters Sagging Again
Fixing the problem is great. Keeping it fixed is even better. Here are some simple habits to protect your gutters long-term:
- Clean them twice a year. Autumn (once the leaves have fallen) and spring are the best times. Regular cleaning stops the build-up of heavy debris that strains the brackets.
- Fit gutter guards. These are mesh or brush-style covers that sit in the gutter and stop most debris getting in. Especially useful if you have trees nearby.
- Check after bad weather. A quick look from the ground after a storm or heavy frost can catch loose brackets or dislodged sections before they become a bigger problem.
- Keep an eye on the fascia boards. Rotten fascia is the number one reason guttering fails and why you end up with gutters falling off the house. Catching a soft spot early, before the whole board needs replacing, can save you a lot of money.
- Switch to uPVC if you haven’t already. Old cast iron or aluminium guttering is much heavier and more prone to causing damaged gutters by pulling away from the house. Modern uPVC guttering is lightweight, doesn’t rust or rot, needs very little maintenance, and typically lasts 25–30 years when properly fitted.
When Is It Worth Replacing the Whole Guttering System?
If your gutters are more than 20 years old and sagging in several places, with cracked joints, failing brackets, and damaged gutters throughout, a full replacement is often better value than repeated patch repairs.
Modern uPVC fascia and guttering systems have a lot going for them:
- Lightweight and strong — no rusting, no rotting, no repainting needed
- Low maintenance — just an occasional rinse
- Good water management — handles heavy UK rainfall without any trouble
- Looks clean and tidy — instantly improves the appearance of your roofline
- Long lifespan — quality uPVC lasts 25–30 years when properly installed
A full replacement by an experienced roofing contractor in Trowbridge protects your home properly and means you’re not constantly spending money on small repairs.
Signs You Need a Professional Gutter Repair
DIY repairs are fine for loose brackets and gutter slope adjustments. But there are situations where calling in a professional is the right move:
- The fascia board is rotten. Replacing fascia involves working around the roof edge and sometimes moving tiles or lead flashing. It’s not a DIY job.
- Multiple sections are sagging. If you need to fix sagging gutters in multiple places along the same run, the system may be at the end of its life, or the fascia along the whole length may have deteriorated.
- You have old cast iron guttering. Cast iron is heavy, brittle, and needs specialist handling. Replacing it with uPVC is almost always the better long-term option.
- Your home is two storeys or more. Working at height without the right equipment and training is genuinely dangerous. A professional has proper access equipment, full insurance, and the experience to work safely.
- Water is getting behind the fascia. If you’re seeing damp patches on interior walls, or the paint behind the guttering is peeling and bubbling, water has already been getting in. You need a professional inspection to check the damage.
At Wiltshire Roofing & Building Ltd, we’ve been helping homeowners across Trowbridge, Chippenham, Melksham, Corsham, Royal Wootton Bassett, and the wider Wiltshire area for over 30 years. Whether it’s a straightforward bracket repair on a sagging gutter or a full uPVC fascia and guttering replacement, our experienced team will give you an honest assessment and a fair price.
We offer free, no-obligation quotes and pride ourselves on clear communication, quality work, and leaving your property tidy when we’re done.
Don’t let sagging gutters turn into a damp problem. Call us today on +44 7555 678003 or get in touch at contact@wiltshireroofingbuildingltd.co.uk.
Conclusion
Sagging gutters are easy to ignore but expensive to leave. Whether it’s one loose bracket or a full system that’s past its best, catching it early is always the cheaper option. Use this guide for minor repairs you can handle yourself but if the damage goes deeper, don’t hesitate to get a professional to look at it.
FAQs
How much does it cost to fix a sagging gutter in the UK?
A simple bracket replacement costs very little in materials usually under £10–£20. If you’re hiring a professional to repair a sagging gutter, expect to pay around £80–£200 depending on how much work is needed and how easy it is to access. A full uPVC gutter replacement on a typical semi-detached home generally runs from £400–£1,000+, depending on the length of the run and whether the fascia needs replacing too.
Can sagging gutters cause damp?
Yes — and it can happen faster than you’d think. When sagging gutters overflow, water runs down your external walls, soaks into the brickwork, and can get inside the house, causing damp patches, mould, and structural damage. Fixing damaged gutters early is always much cheaper than treating damp later.
How long does gutter repair take?
A straightforward bracket replacement usually takes an experienced roofer 1–2 hours. A full gutter replacement on a standard house is generally a one-day job.